Player Stats
Things that keep you ticking.
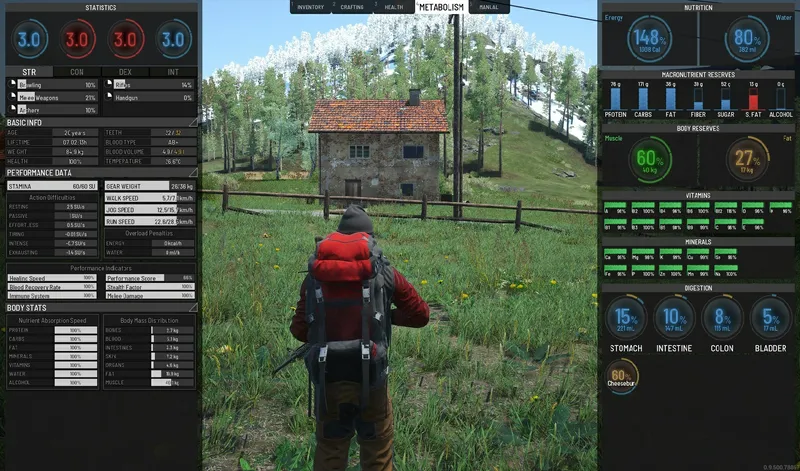
Player statistics hold a lot of useful data and can be used to describe any prisoner who sets foot on The Island. Keeping track of everything is not simple, but this panel makes it a lot easier.
Attributes And Skills
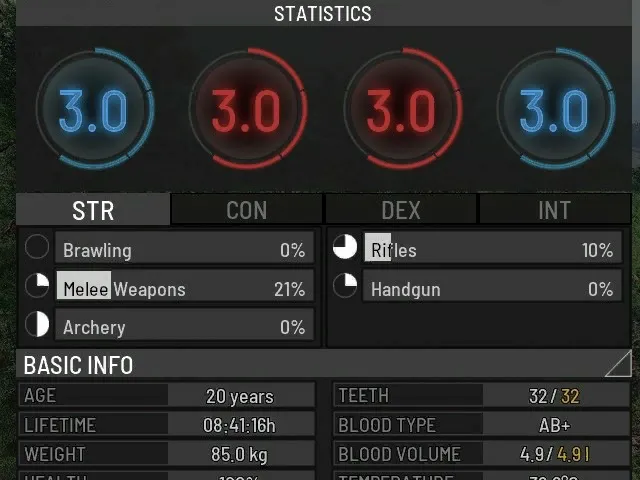
All the relevant information about each specific Attribute and Skill is written in the Attributes And Skills category of the codex. Details about skill progression and detailed attribute changes can be seen when hovering on any of the attributes or skills.
IMPORTANT - Attribute level caps how much a skill can be raised. If, for some reason, any of the attributes fall below a certain level, all of the related skills will remain as they were, but no more XP will be given until the Attribute is raised to the previous level.
Basic Info
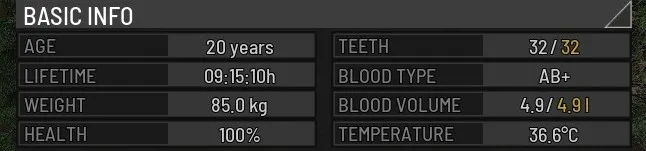
Basic info provides information like Age, Lifetime, Weight, Health, etc. Most of them provide very useful additional data when hovered upon.
Performance Data
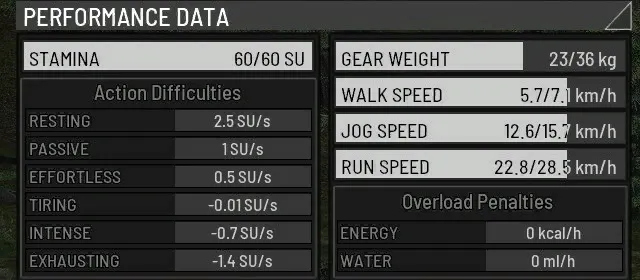
Performance data holds a lot of crucial information which can really come in handy when trying to survive.
Stamina Units determine how many actions you can do before you get fatigued. Max stamina is directly influenced by the CON attribute: The higher your CON, the more stamina you can have. Stamina units can also fall into the negative range, with the maximum negative value always mirroring the maximum positive value. Exceeding this negative threshold results in the Energy Crash condition. Stamina consumption and recovery are influenced by Action Difficulty (rates shown below).
Action Difficulty is a literal representation of how difficult it is to perform a certain action. It can be seen in the HUD around the stamina circle bar.
Gear weight shows how many kilograms of gear you can carry without suffering any penalties. Max gear weight is directly influenced by the STR attribute: The higher your STR, the more gear you can carry. Gear weight also increases if you push a wheelbarrow, for example. If you carry too much, your character will have increased energy and water consumption, appear visually hunched over and get the Overburdened condition, which reduces their maximum pace.
Walk speed shows how fast you can walk. It is directly influenced by the performance score.
Jog speed shows how fast you can jog. It is directly influenced by the performance score and it can also be increased or decreased by raising or lowering the Running skill.
Run speed shows how fast you can run. It is directly influenced by the performance score and it can also be increased or decreased by raising or lowering the Running skill.
If you are overloaded, your character requires more energy than it usually would. The energy penalty represents how much more energy your character will spend in kilocalories per hour.
If you are overloaded, your character requires more water than usual. The water penalty represents how much more water your character will spend in milliliters per hour.
Performance Indicators
Healing speed shows how quickly your body is capable of stabilizing various conditions and injuries. It directly depends on the CON attribute and AD.
The Blood Recovery Rate shows how fast you will recover blood compared to your normal Blood Recovery Rate. If you lose blood faster than you can recover it, you will potentially bleed out and die.
The immune system determines how quickly you will recover from various infections and how likely you are to get an infection in the first place. The strength of your immune system largely depends on your Constitution attribute. It can be boosted by consuming antibiotics.
A performance score is a unit for action execution speed. It influences how fast you can run, walk, paddle, chop, etc. The performance score depends on three things: muscle mass, body fat and the prisoner’s weight load. The percentage is scaled for your current character and your max performance score value can be decreased or increased by altering the three things mentioned above.
Stealth factor shows your ability to remain hidden and unheard. If the Stealth Factor indicator falls, your ability to stay unnoticed falls.
The Melee Damage indicator shows how much melee damage you will do compared to the maximum damage you can do. For example, if you get a penalty on the STR attribute because you have the “Weakness” condition, the Melee Damage indicator will drop. When you treat the “Weakness” condition, it will return back to normal.

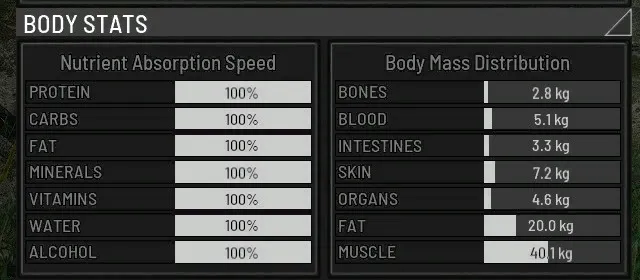
Body Stats
Body Stats show a general statistic of how fast a certain nutrient is absorbed and how is the Body Mass Distributed. It's a good practice to keep an eye on this panel as heavy irregularities can cause issues as severe as death.
For example, reserves of body fat change depending on the diet and difficulty of physical action one does. If they were to fall to a critical level, it could lead to death.
Official SCUM in-game content (the game’s own text, translated by the studio).